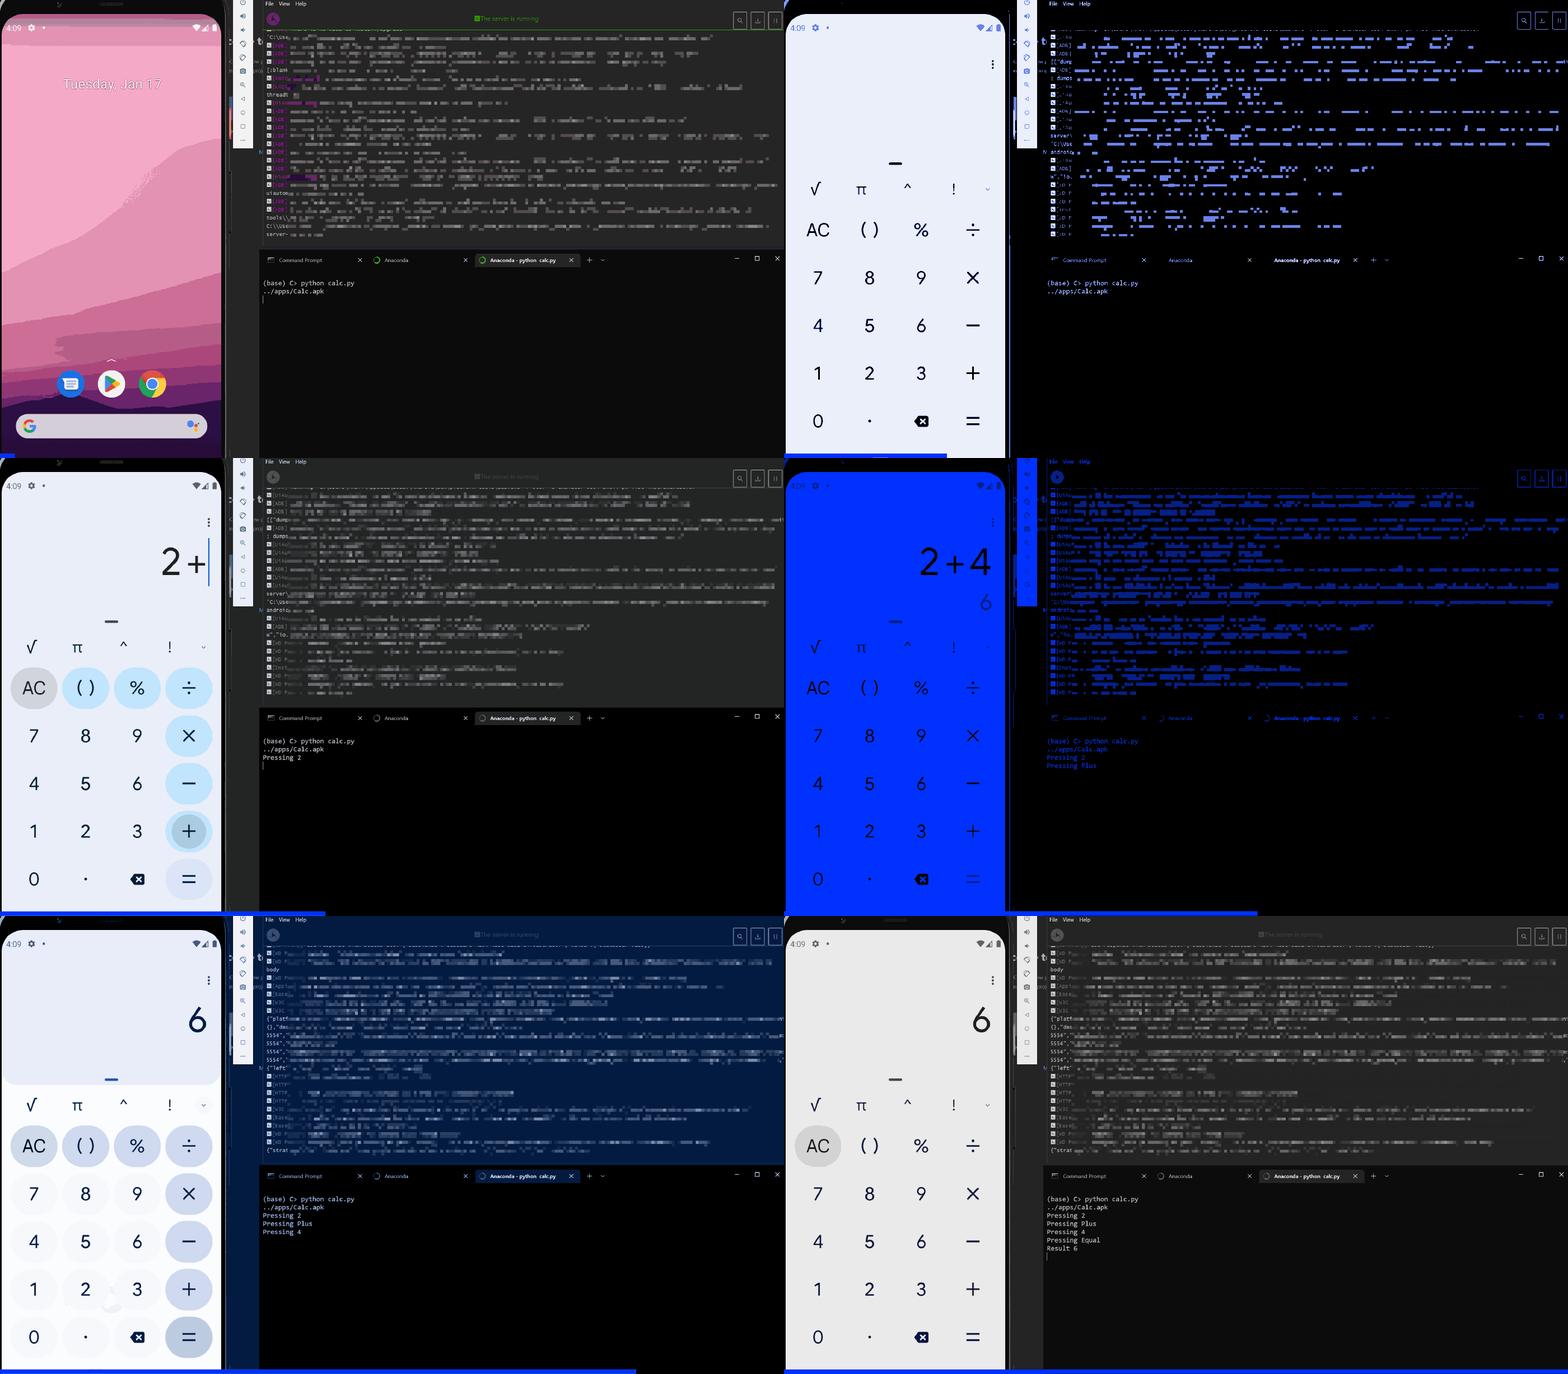
Python Automation Android Calculator
Getting Started
In the last post Appium Desktop Inspector – Part 2 we successfully used Appium Desktop Inspector to inspect elements to use for automating Android apps. In this post will cover Python script to finish out this series. This is for demonstration purposes and no error checking or code efficiency is implemented.
Prerequisites
- Python 3.8.8
- Appium-Python-Client
Download the project in the github py-auto-calc-mobile
Set Appium Python
│   README.md
│
├───apps
│       Calc.apk
│
├───code
│       calc-install.py
│       calc.py
pip install Appium-Python-Client
Include the following libraries
from appium import webdriver
from appium.webdriver.common.touch_action import TouchAction
from appium.webdriver.common.appiumby import AppiumBy
import os
import time
Setup Desired Capabilities
Setup your desired capabilities before running the test. There are two versions of this setup. One assumes calculator already installed and the other will install the app.
In the calc.py and calc-install.py file, update the information about platformName, deviceName, app(PATH of your app), appPackage and appActivity.
Already installed
# Parameters
DEVICE_NAME = "My Phone"
PLATFORM_VERSION = "11"
APP_PACK = "com.google.android.calculator"
APP_ACT = "com.android.calculator2.Calculator"

desired_cap  = {
    "deviceName": DEVICE_NAME,
    "platformName": "Android",
    "udid": "emulator-5554",
    "platformVersion":  PLATFORM_VERSION,
    "automationName": "UiAutomator2",
    "appPackage": APP_PACK,
    "appActivity": APP_ACT,
    "noReset": "true"
}

# CONNECT TO APPIUM
driver = webdriver.Remote("http://127.0.0.1:4723/wd/hub", desired_cap)
Install App
If app is not installed use calc-install.py then this needs to be include the following to the desired capabilities. "app": "/paht-to-app/app.apk",
# Parameters
DEVICE_NAME = "My Phone"
PLATFORM_VERSION = "11"

# Returns abs path relative to this file and not cwd
PATH = lambda p: os.path.abspath(
    os.path.join(os.path.dirname(__file__), p)
)

APP_PATH = PATH( "../apps/Calc.apk" )

print(APP_PATH)

# Desired Capabilities

desired_cap  = {
    "deviceName": DEVICE_NAME,
    "platformName": "Android",
    "udid": "emulator-5554",
    "platformVersion":  PLATFORM_VERSION,
    "automationName": "UiAutomator2",
    "app": APP_PATH,
    "noReset": "true"
}

# CONNECT TO APPIUM
driver = webdriver.Remote("http://127.0.0.1:4723/wd/hub", desired_cap)
Test Case
In the last post we pulled the element IDs Appium Desktop Inspector – Part 2
# Test case to test addition operation
... TRUNCATED OUTPUT ...
def test_add_operation():
    driver.find_element(AppiumBy.ID, "com.google.android.calculator:id/digit_2").click()
    print("Pressing 2")
    driver.find_element(AppiumBy.ID, "com.google.android.calculator:id/op_add").click()
    print("Pressing Plus")
... TRUNCATED OUTPUT ...
Stop the Appium Driver
def tearDown():
    # Close is not working with appium so I've used quit
    driver.quit()
Summary
This was a very simple setup to demonstrate application automation with Android and Appium.
Next in the Series:
Related Posts
2023 Phoenix VMUG UserCon
Introduction: The recent 2023 Phoenix VMUG UserCon brought together some like-minded people in the field, with discussions ranging from VMware technologies to best practices for optimizing existing systems.
Read moreRed Hat User Group Insights, Ansible Automation Platform, and ITSM Integration
Introduction: This blog post aims to summarize the key takeaways from this informative workshop. At the recent Red Hat User Group workshop on Red Hat Insights, Red Hat Ansible Automation Platform, and their integration with management (ITSM) systems, such as ServiceNow, provided valuable insights into how these technologies work together.
Read moreRobocopy Examples
Robocopy Examples Robocopy has many command line options and it can be overwhelming to know which commands to use. In this post, we will take a look at how to ues robocopy to copy, mirror, purge Files and Folders.
Read more


